


How to Polish Epoxy Resin for a Glossy Finish – Simple Step-by-Step Guide
26 month 07 2025
breakwooden
Want your epoxy projects to shine like glass? Polishing is the final (and most satisfying) step to bring out the full beauty of your resin creations. Whether you're working on a lamp, tabletop, or keycap, this guide will help you achieve a crystal-clear, glossy finish with ease.
🧼 Step 1: Clean the Surface
Start by wiping the resin surface clean. Use a microfiber cloth to remove dust, fingerprints, or oils before polishing.

🧼 Step 2: Sand If Needed
If the surface has scratches or feels uneven, gently sand it using fine-grit sandpaper (starting from 800 to 2000 grit). Always sand wet to avoid heat or dust buildup.
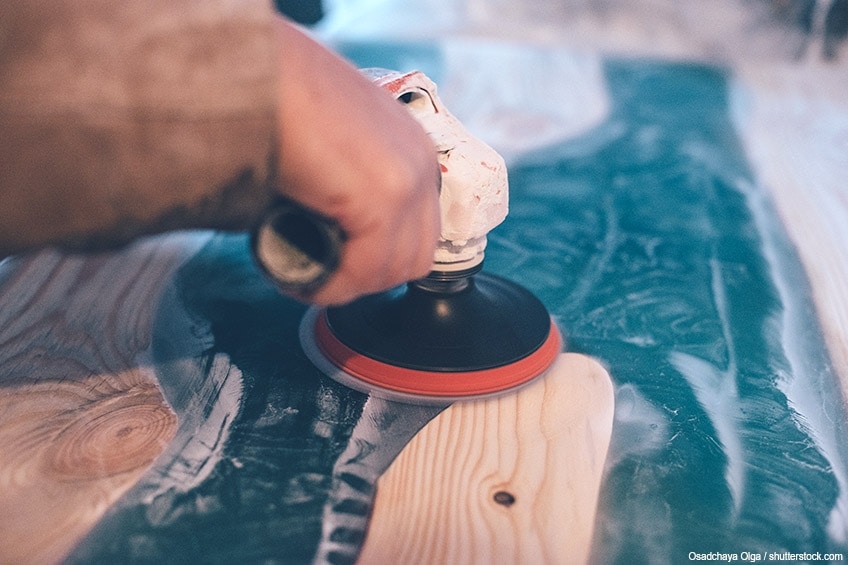
✨ Step 3: Apply Polishing Compound
Use a small amount of plastic or resin polishing compound. Apply it in circular motions using a soft cloth or foam pad. A slow, steady buff is all you need to bring out the shine.

🔁 Step 4: Buff and Repeat
Wipe off excess polish and repeat the buffing process until you achieve the desired gloss. The more you polish, the deeper the shine.

💡 Bonus Tip: DIY Polish Hack
In a pinch, toothpaste (non-gel type) can act as a mild polishing compound—perfect for small resin items like keycaps or pendants.
Final Thoughts
Polishing epoxy doesn’t need fancy tools—just patience and the right technique. Whether you're creating resin lamps or custom décor, a smooth, glossy surface makes your work truly stand out.
Category
Related News

14 month 11 2025
Powerful Mewtwo Resin Lamp 1 – Unleash Psychic Power in Glow
If you’re looking for a décor piece that blends legend, fandom and ambient lighting into one captivating design, the Powerful Mewtwo Resin Lamp 1 from Breakwooden is a standout choice. It’s not just a lamp—it’s a tribute to one of Pokémon’s most iconic figures, captured in resin and light, ready to transform your space. Design & Inspiration Inspired by the legendary psychic Pokémon “Mewtwo,” this lamp aims to evoke sheer power, mystery and presence. Encased within high-clarity resin, the design imbues Mewtwo’s aura—his poised stance, those focused eyes, the energy around him—captured in suspended form. Whether you’re a gamer, collector, or décor-enthusiast, placing...
See more
13 month 11 2025
Unleash Alien Invasion on Your Keyboard: The Xenomorph Artisan Resin Keycap by Breakwooden
If you're looking to inject serious character into your mechanical keyboard, the Xenomorph Artisan Resin Keycap by Breakwooden doesn’t just sit quietly—it dominates your setup. This handcrafted keystone piece channels sci-fi horror and artisan craftsmanship into one powerful accessory. Design & Concept From its sculpted resin form to its detailed paintwork and compatibility with Cherry MX switches, this keycap brings the iconic alien aesthetic to your fingertip. The miniature xenomorph figure is meticulously captured: elongated head, biomechanical ridges, ominous silhouette. The resin body provides depth and clarity, allowing the figure to appear as if emerging from the surface itself. With each press, you’re...
See more
12 month 11 2025
Xenomorph Resin Lamp – Egg: A Glowing Specimen of Sci-Fi Horror
If you're looking for a décor piece that blends horror, science fiction and ambient lighting into one unforgettable artifact, look no further than the Xenomorph Resin Lamp – Egg by Breakwooden. This lamp doesn’t just provide light — it invites you into a cinematic moment captured in resin, making it the ultimate statement for fans of eerie aesthetics and collector décor. Design & Concept Imagine the iconic alien lifeform encased in a translucent shell, glowing from within — the moment of incubation suspended in time. The Xenomorph Resin Lamp – Egg replicates that cinematic tension: you’re not just buying a lamp, you’re...
See more
11 month 11 2025
Bring Pokémon to Your Keyboard: Grookey & Drifloon Artisan Keycaps from Breakwooden
If you're a Pokémon fan who types, games, or customizes your keyboard setup, these two artisan keycaps from Breakwooden are not just accessories — they’re character-filled statements for your workstation. Grookey Artisan Keycap — “Jungle Energy at Your Fingertips” The Grookey keycap is all about vibrancy, fun, and the spirit of nature. With vibrant green tones and the playful monkey-like features of the Pokémon Grookey, this artisan keycap brings a dash of jungle energy to your mechanical keyboard. On the product page, it’s priced at $29.71 (discounted from $59.42). Why It Works Hand-crafted resin: The keycap is fully handcrafted in premium resin, meaning each...
See more
10 month 11 2025
Fierce Battle Resin Lamp – Capture the Epic in Light and Resin
When décor rises beyond mere function and becomes story, that’s where the Fierce Battle Resin Lamp comes in. Crafted by BreakWooden, this lamp freezes a moment of mythic conflict within glowing resin—turning ordinary light into an immersive spectacle. Design & Atmosphere Imagine a battlefield across time and space: warriors clashing, energy swirling, silhouettes frozen mid-strike. This lamp captures that drama inside a sculptural cube of resin. The resin blocks not only house the scene but also diffuse light, casting deep shadows and subtle glows that enhance every sculptural contour. Compact in size (listed as ~5 × 5 × 5 cm) yet visually bold, it’s...
See more